White Cake with Strawberry and Lemon Frostings

Birthdays can often be difficult for me, as I am sure they are for many others. I never seem to know what someone truly wants to do and how to ensure that they feel important on their special day. Are they the type who want a long and thoughtful card or do they just want a really good gift? Do they want to just spend the day chilling or do they want a crazy, spontaneous day filled with surprises?

When trying to figure out what to do for birthdays, I seem to always find myself going back to the cake. If I know someone well enough, I can make a flavor and ‘genre’ of cake that will help them appreciate that I took the time to think of them and worked to make their birthday special. The other day was our family friend Laura’s birthday, and I ultimately decided to spend the day making her a cake.

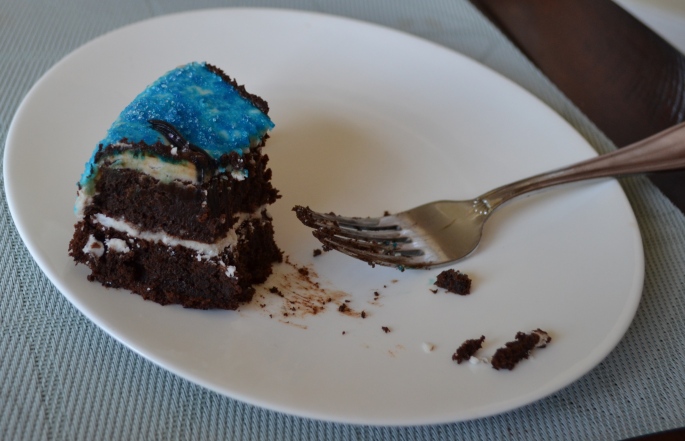
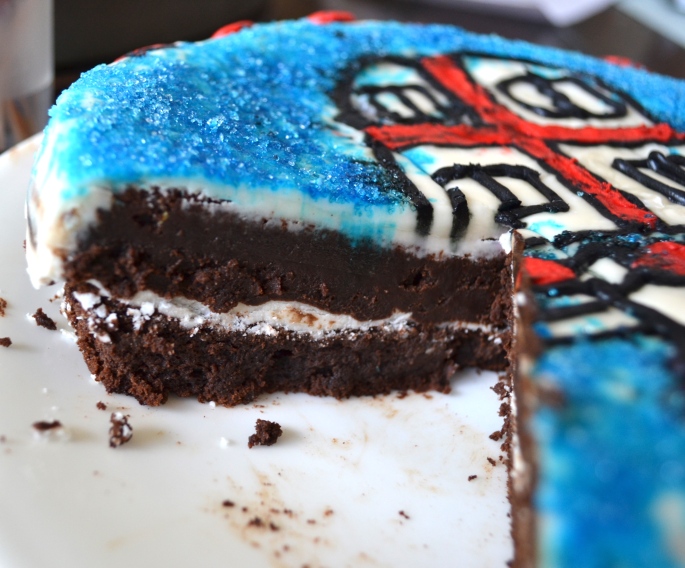
After speaking with her husband, I decided that Laura was more of a fruity, sweet person rather than a warm, chocolatey, savory person, and that I would make a simple white cake with fruit frosting. Laura loves the summer (who doesn’t), so I decided to make a summer cake, filled with a lemon filling and topped with a fresh strawberry frosting. The middle layer of the cake was a tie-dye purple and pink pattern and the cake was topped with bright sprinkles. Laura, and the rest of the guests who came to our apartment to celebrate, raved about the cake.


dsc_0182


INGREDIENTS

1 cup white sugar

3/4 cup butter

2 eggs

2 teaspoons vanilla extract

1 1/2 cups all-purpose flour

1 3/4 teaspoons baking powder

1/2 cup milk

FRESH STRAWBERRY FROSTING

4 cups of Powdered Sugar

1 cup Butter (We use Salted Sweet Cream Butter)

1/2 cup Pureed Fresh Strawberries

1/2 tsp vanilla

LEMON ICING

1/2 cup Butter

2 tablespoons lemon juice

1/2 tsp vanilla extract

3 cups of confectioners sugar


DIRECTIONS:

  1. Preheat oven to 350 degrees F (175 degrees C). Grease and flour a 9×9 inch pan or line a muffin pan with paper liners.
  2. In a medium bowl, cream together the sugar and butter for 7-9 minutes (the timing is very important!). Beat in the eggs one at a time for 3 minutes each, then stir in the vanilla. Combine flour and baking powder, sift and add to the creamed mixture and mix well. Finally stir in the milk until batter is smooth. Pour or spoon batter into the prepared pan.
  3. Bake for 30 to 40 minutes in the preheated oven. For cupcakes, bake 20 to 25 minutes. Cake is done when it springs back to the touch.
  4. Meanwhile, make the strawberry frosting and lemon icing.
    1.  For the strawberry frosting blend the butter and sugar for around 5 minutes and then add the vanilla and strawberry puree.
    2. For the lemon icing, Combine all ingredients and beet until fluffy (3 minutes). Add more confectioner’s sugar, or lemon juice to adjust the consistency as needed. For stronger lemon flavor, add a little lemon test.
  5. Frost the white cake with both frostings and enjoy!!

Love,

Ally

** I tripled the recipe to make a three-layer cake.

My 16th, Gluten-Free Vanilla Birthday Cake!!

October 25th was my 16th birthday, and I decided that I didn’t want to go overboard to celebrate. My Bat Mitzvah was a few years ago, and that was enough of a big party experience to last a lifetime. Happily, I did end up having a really, really fun day. I had a volleyball game at my high school (which we won of course), and my dad brought doughnuts for after the game from Harold’s Square. My team and I all sat around chatting, munching on doughnuts, and hanging out for a little while. I was able to get my massive amounts of homework done ahead of time, so I had a fun, relaxing afternoon.

After the volleyball game, my dad and I took the train to 84th and Amsterdam, where we ate dinner at a fabulous restaurant called Jacob’s Pickles. We ordered fried artichokes as a starter and they were delicious. I ordered a warm and perfectly seasoned salmon salad for dinner, while my dad enjoyed a chicken sandwich. Obviously, being a foodie, I couldn’t have been happier to try such savory foods with a Southern flair.

On the way home from the restaurant, we stopped at Ben and Jerry’s, across from our apartment on 103rd and Broadway, to buy my beloved ice cream cake. Unfortunately, we discovered that all of the cakes ‘may contain nuts’.  We walked up to another ice cream shop on 107th and bought a java chip and dulce de leche cake that made my love for ice cream cakes only grow. After eating cake and opening presents, I ended my day by watching an episode of House MD.

🙂

The following weekend my family threw a party for me with some family friends, and I couldn’t wait to make a Halloween themed birthday cake. I wanted to try my hands at a simple white cake with lemon, cream cheese, and buttercream frosting. The cake turned out perfect – inside and out. I hope you enjoy!!!

**I added a 1/2 cup of sprinkles before pouring the batter onto the prepared pans. The finished product turned out really festive and cheery, and I recommend adding sprinkles to spice up your traditionally boring ‘white cake’ interior.

INGREDIENTS

2 cups  all purpose gluten free flour blend

1 teaspoon xanthan gum (unless your blend already contains it)

1/4 cup + 2 tablespoons cornstarch

1/2 teaspoon baking soda

2 teaspoons baking powder

1/2 teaspoon kosher salt

10 tablespoons unsalted butter, at room temperature

1 1/2 cups (300 g) granulated sugar

2 teaspoons pure vanilla extract

4 egg whites + 1 whole egg , at room temperature

1 1/3 cups (10 2/3 fluid ounces) buttermilk, at room temperature

*To halve the recipe, use 3 egg whites (75 g) in place of the 4 egg whites and 1 whole egg.

DIRECTIONS

  1. Preheat your oven to 350°F. Grease 2 8-inch round cake pans and line the bottom of each with a round of parchment paper (trace the perimeter of the cake pan on the parchment, then cut out the circle). Set the pans aside.

  2. Into a medium-size bowl, sift the flour, xanthan gum, cornstarch, baking soda and baking powder. Add the salt, and whisk to combine well. Set dry ingredients aside.

  3.  In a large bowl, beat the butter, sugar and vanilla with an electric mixer on medium-high speed for at least 3 minutes, stopping at least once to scrape the entire mixture off the sides and bottom of the bowl. The mixture should be very light and fluffy.

  4. Separately, whisk together the egg whites, egg and buttermilk in a small bowl.

  5. Alternate adding the the dry ingredients with the buttermilk and egg mixture in 4 different parts, starting and ending with the dry. The batter may appear curdled at times.

  6. Once all of the ingredients have been added, scrape the sides of the bowl and beat for another minute on medium speed to ensure that everything is combined. Then turn over the batter a few times by hand. It should be very thickly pourable and relatively smooth.

  7. Divide the batter evenly between the two prepared baking pans and smooth each into an even layer with an offset spatula. To remove air bubbles, bang each pan on the counter a few times.

  8. Place the baking pans in the center of the preheated oven and bake for 20 minutes. After 20 minutes rotate the pans, and continue to bake until the cakes are lightly golden brown all over, and have began to pull away from the sides. This will be around another 10 minutes, baking for a total of about 30.

  9. Remove the cakes from the oven and allow to cool in the pans for 15 minutes before turning out upside down onto a wire rack (and removing the parchment paper liners). Cool completely before frosting and serving.
  10. Here is the lemon, cream cheese buttercream frosting recipe. I will post my modified version at another time.(http://allrecipes.com/recipe/7556/lemon-cream-cheese-frosting/)

Love,

Ally

Vegan Cupcakes with Chocolate Frosting

When I was 9 years old, in the same weekend I visited a wonderful petting zoo in Oakland on Saturday and on Sunday I was ‘taught’ the in’s and out’s of animal cruelty by my 7 year old next door neighbor and good friend. Of course, I ultimately decided to become a strict vegetarian. Like most children trying new things, this attempt lasted no longer than two weeks. My parents ‘cure’ was to cook spaghetti and meatballs for dinner.

Although my vegetarianism was a short-lived extravaganza, I have always admired the ideals and reasoning behind vegetarian and/or vegan living. In my English class this year we were assigned a creative project on a societal flaw, and one of my peers chose to present on animal cruelty and the motives behind living a vegan life. Her presentation was both fascinating and heartbreaking, and I immediately became interested in vegan lifestyles. This let me to research vegan recipes. After trying a few out, I started to fall  in love with vegan baking. Knowing that I will probably never be vegan doesn’t stop me from trying to bake delicious vegan treats.

While eating at vegan restaurants in NYC is always an eye-opening and fun experience, I struggle to find homemade vegan cookies, cupcakes brownies etc. that I am proud to give out to my vegan friends. This recipe is definitely an exception. These vegan vanilla cupcakes tasted no different than any other cupcake I’ve made, and the chocolate frosting, even without butter and milk, tasted delicious. My success with this recipe has definitely inspired me to continue to trying vegan recipes in the future. I can’t wait to try some vegan brownies next! ENJOY!

dsc_0105


dsc_0094

INGREDIANTS:

Cupcakes:

1 tablespoon apple cider vinegar

1 1/2 cups almond milk

2 cups all-purpose flour

1 cup white sugar

2 teaspoons baking powder

1/2 teaspoon baking soda

1/2 teaspoon salt

1/2 cup coconut oil, warmed until liquid

1 1/4 teaspoons vanilla extract

Vegan Buttercream Chocolate Frosting:

1 cup cocoa powder, unsweetened (sifted)

1 1/4 sticks of vegan butter (softened)

3 1/2 cups powdered sugar

1/2 cup non-dairy milk (almond)

1 tsp vanilla extract


DIRECTIONS:

  1. Preheat oven to 350 degrees F . Grease two 12 cup muffin pans or line with 18 paper baking cups.
  2. Measure the apple cider vinegar into a 2 cup measuring cup. Fill with almond milk to make 1 1/2 cups. Let stand until curdled, about 5 minutes.
  3. In a large bowl, Whisk together the flour, sugar, baking powder, baking soda and salt.
  4. In a separate bowl, whisk together the almond milk mixture, coconut oil and vanilla.
  5. Pour the wet ingredients into the dry ingredients and stir just until blended. Spoon the batter into the prepared cups, dividing evenly.
  6. Bake in the preheated oven until the tops spring back when lightly pressed, 15 to 20 minutes. When done, cool in the pan over a wire rack.
  7. While the cupcakes are baking, make the vegan frosting:
    1. Add the butter, milk, vanilla extract and cocoa powder to a large mixing bowl and using an electric hand or standing beater, start mixing them together until the liquids thicken with the fluffy cocoa. Turn beater on low and beat until smooth.
    2. Add in the powdered sugar one cup at a time and beat until frosting is fluffy. Avoid overbeating.
  8. Frost the chocolate frosting onto the cupcakes when they are completely cooled. If the cakes are warm, the heat will easily melt the vegan butter.

Love,

Ally!

Lemon Cupcakes with Blackberry Frosting

Taking a small step away from Fall-themed baking, I decided to try making this cupcake recipe that I have seen on AllRecipes.com for sooooo long. It was on my ‘To-Bake’ list all Summer, but I just never got around to trying it out. Last week, we had a ton of extra lemons laying around, and I was in the mood to make something unique. These lemon and blackberry cupcakes seemed to fit my mood perfectly.
I was planning on selling the cupcakes at a bake sale that my volleyball team was holding on Thursday, but unfortunately Wednesday was Yom Kippur. The only thing harder than fasting, is fasting while baking. I decided to see if I could push through it, and bake anyway. Although it was really difficult, I finished baking the cupcakes without having taken a single bite!  After I broke the fast, and tried a cupcake, I decided that it was definitely worth the wait.
In this recipe, the subtle sweetness of the blackberry blends perfectly with the fruity lemon cupcake interior. I packaged them up the next morning, took the cupcakes to the bake sale, and they were sold in minutes. I would 1000% recommend this recipe for anyone who wants a unique cupcake that everyone will love. Enjoy!

dsc_0052


dsc_0053


Ingredients

1 cup white sugar

1/2 cup butter

2 eggs

1 1/2 teaspoons vanilla extract

1 1/2 cups all-purpose flour

1 3/4 teaspoons baking powder

1/2 cup low-fat milk

1 lemon, juice and zest

1 cup butter, softened

1 teaspoon vanilla extract

1/4 teaspoon salt

4 cups confectioners’ sugar

1/2 cup seedless blackberry jam

Directions

  1. Preheat oven to 350 degrees F (175 degrees C).
  2. Line 24 muffin cups with paper liners.
  3. Cream sugar and 1/2 cup butter in the bowl of a stand mixer until fluffy. Beat in eggs, one at a time, and mix 1 1/2 teaspoons vanilla extract into mixture with the second egg.
  4. Beat in flour and baking powder until thoroughly combined; beat in milk, lemon juice, and lemon zest to make a smooth batter.
  5. Spoon the batter into the prepared muffin cups.
  6. Bake in the preheated oven until cupcake edges are slightly golden brown and a toothpick inserted into the center of a cupcake comes out clean, 20 to 25 minutes. Cool cupcakes completely.
  7. Beat 1 cup butter with 1 teaspoon vanilla extract and salt until smooth and creamy. Beat in confectioners’ sugar, 1 cup at a time, to make a creamy frosting. Beat in blackberry jam. Spread frosting on cooled cupcakes.

Love,

Ally


(http://allrecipes.com/recipe/220884/lemon-cupcake-with-blackberry-buttercream/)

Cream Cheese Pound Cake

While I love going out with friends, exercising at the gym, and spending the day outdoors, I definitely have way too many lazy, ‘never leave the house’ days. On these days, I generally find myself reading, watching tv, and of course cooking and baking. Yesterday was one of those days. After sweating through my class at the gym in the morning, I didn’t set foot outside my apartment all day.

I wanted to bake something for my great-grandmother who lives on the Upper West Side, but we only had the most basic of ingredients in our tiny kitchen: flour, sugar, eggs, butter, salt, vanilla, and cream cheese. The idea of having to change out of my sweats and walk across the street to the grocery store was obviously ludicrous, so I decided I would work with what I had.

I found the perfect recipe – a simple cream cheese pound cake with amazing reviews on AllRecipes.com. I had always found pound cake to be bland, dry and tedious to bake, but I really enjoyed myself while making this cake. The cake had more flavor and moisture than I expected, and it was exactly the type of simple dessert that my Viennese great-grandmother always loved. I was definitely glad that I was too lazy to leave my house today. ENJOY!

DSC_0041 copy

DSC_0060 copy

Ingredients:

1 (8 ounce) package cream cheese -at room temperature or slightly softened

1 1/2 cups butter- at room temperature or slightly softened

3 cups white sugar

6 eggs

3 cups all-purpose flour

1 teaspoon vanilla extract

Directions                      

  1. Preheat oven to 325 degrees F (160 degrees C) grease and flour a 10 inch tube pan.
  2. In a large bowl, cream butter and cream cheese until smooth. Add sugar gradually and beat until fluffy.
  3. Add eggs two at a time, beating well with each addition. Add the flour all at once and mix in. Add vanilla.
  4. Pour into a 10 inch tube pan. Bake at 325 degrees F (160 degrees C) for 1 hour and 20 minutes. Baking time depends on the cake, so check for doneness at 1 hour. A toothpick or knife inserted into center of cake will come out clean.

Love,

Ally

Gluten-Free No-Bake Cheesecake

Since my brother is leaving for college in two weeks, and in NYC an unused bedroom is a decadent luxury, my family packed up our apartment in The Village and moved into a new apartment on the Upper West Side. Don’t worry, my kitchen is still very tiny. I wanted the first thing made in our new kitchen to be delish, but my return from Costa Rica coincided with a 103 degree NYC heat wave. Since it was so hot, and we hadn’t had air conditioning installed in our new apartment, I had to refrain from using the oven. I decided to make a no-bake, simple and classic cheesecake. The cheesecake came out very rich, creamy, and delicious. My dad loves caramel, so I decided to use a homemade caramel topping instead of cherry pie filling – but either works. ENJOY!
** In my pictures the cheesecake appears very thin. I had to cut the recipe in half since we didn’t have an entire pint of heavy cream. Otherwise, the cheesecake should be about twice as thick.
DSC_0102.JPG
DSC_0103
DSC_0082.JPG

INGREDIENTS:

Crust

1 1/2 cups gluten-free graham cracker crumbs
https://www.amazon.com/Kinnikinnick-Gluten-Graham-Style-Crumbs/dp/B004VELEGU/ref=sr_1_1_a_it?ie=UTF8&qid=1503859148&sr=8-1&keywords=gluten+free+graham+cracker+crumbs

1/2 teaspoon ground cinnamon

1/3 cup packed brown sugar

1/3 cup butter, melted

Cheesecake

2 (8 ounce) packages cream cheese


2 teaspoons lemon juice

1 pint heavy whipping cream

1/3 cup white sugar

Caramel Topping

1 cup granulated sugar

6 tablespoons butter

1/2 cup of heavy cream

1 teaspoon vanilla

1/2 teaspoon of salt


DIRECTIONS:

  1. In a small bowl, stir together the gf graham cracker crumbs, cinnamon, and brown sugar. Add melted butter and mix well.
  2. Press into the bottom of an 8 or 10 inch springform pan. Chill until firm.
  3. In a medium bowl, beat together the cream cheese and lemon juice until soft.
  4. Add whipping cream and beat with an electric mixer until batter becomes thick. Add the sugar and continue to beat until stiff.
  5. Pour into chilled crust, and top with pie filling. Chill for one hour.
  6. While chilling make caramel topping. 
    1. Caramel Topping: Heat granulated sugar in a medium saucepan over medium heat, stirring constantly with a high heat resistant rubber spatula or wooden spoon. Be careful not to burn.
    2. Once sugar is melted, immediately add the butter. 
    3. Stir the butter into the sugar until it is completely melted, about 2-3 minutes. 
    4. Very slowly, drizzle in 1/2 cup of heavy cream while stirring. The mixture will rapidly bubble and/or splatter when added.
    5. Allow the mixture to boil for 1 minute. Remove from heat and stir in 1/2 teaspoon of salt. Allow to cool down before using.
  7. Pour Warm Caramel Topping onto the middle of the top of the cheesecakes. The caramel topping should spread out on its own. 
  8. Chill for several more hours or overnight.

Love,

Ally

Flourless Chocolate Cake

Like many other bakers I know, I LOVE decorating cakes and, although challenging, I enjoy myself. My brother’s high school graduation was in June, and I was so excited to make a fun and creative cake for him. I first drew sketches of how I wanted his cake to look, and I couldn’t wait to get started. Since he will be attending Brown University, I planned of the design centering around the Brown logo with the years he will be attending on the side.

Unfortunately our apartment was cleaned top-to-bottom 3 days before the party, and the kitchen was off-limits to me for the week. So I was unable to make the cake for his official party. I decided that I would still make a belated graduation cake. I wanted my mom to be able to enjoy it, and so I was determined to find a gluten-free recipe. What is better than a rich, decedent flourless chocolate cake? This cake is so creamy but also so smooth and sensational. My brother loved it, and I could not have been more proud. This is one of my favorite gluten-free cakes, and I was so glad that my entire family could enjoy it.

I used a simple buttercream frosting recipe to make the cake more “birthday cake-like”, but I would highly recommend using a chocolate ganache as a glaze instead. ENJOY!

DSC_0162

DSC_0055

DSC_0136


INGREDIENTS

1 cup semisweet or bittersweet chocolate chips

1/2 cup unsalted butter

3/4 cup granulated sugar

1/4 teaspoon salt

1 to 2 teaspoons espresso powder optional

1 teaspoon vanilla extract, optional

3 large eggs

1/2 cup unsweetened cocoa powder


Optional Chocolate Ganache Glaze

1 cup semisweet or bittersweet chocolate chips

1/2 cup heavy cream


DIRECTIONS

  1. Preheat the oven to 375°F. Lightly grease an 8″ round cake pan; cut a piece of parchment or waxed paper to fit, grease it, and lay it in the bottom of the pan.
  2. To make the cake: Put the chocolate and butter in a microwave-safe bowl, and heat until the butter is melted and the chips are soft. Stir until the chips melt, reheating briefly if necessary. You can also do this over a burner set at very low heat. Transfer the melted chocolate/butter to a mixing bowl.
  3. Stir in the sugar, salt, espresso powder, and vanilla. Espresso enhances chocolate’s flavor much as vanilla does; using 1 teaspoon will simply enhance the flavor, while 2 teaspoons will lend a hint of mocha to the cake.
  4. Add the eggs, beating briefly until smooth. Add the cocoa powder, and mix just to combine.
  5. Spoon the batter into the prepared pan.
  6. Bake the cake for 25 minutes; the top will have formed a thin crust, and it should register at least 200°F on an instant-read thermometer inserted into its center.
  7. Remove it from the oven, and cool it in the pan for 5 minutes.
  8. Loosen the edges of the pan with a table knife or nylon spreader, and turn it out onto a serving plate. The top will now be on the bottom; that’s fine. Also, the edges will crumble a bit, which is also fine. Allow the cake to cool completely before glazing.

To make the glaze: Combine the chocolate and cream in a microwave-safe bowl, and heat until the cream is very hot, but not simmering. Remove from the microwave, and stir until the chocolate melts and the mixture is completely smooth. Spoon the glaze over the cake, spreading it to drip over the sides a bit. Allow the glaze to set for several hours before serving the cake.


Love,

Ally

Pineapple Upside-Down Cake

I was asking my friends today at lunch for suggestions on what I should bake tonight for this blog. A few girls insisted on this cake (mostly because they wanted me to bring it to school the next day). I wanted to make something fruity, celebrating the fact that it was finally warm out, and I wanted to try my hand at something unique. This recipe definitely seemed like it fit both of these categories.

Coincidentally, when I was Googling recipes for Pineapple Upside-Down Cake this afternoon, the first link that popped up informed me that today happened to be “National Pineapple Upside-Down Cake Day.” (https://foodimentary.com/2016/04/20/april-20-is-national-pineapple-upside-down-cake-day-2/) Out of 365 days in a year, I happened to make this recipe on its ‘holiday’. I’m pretty sure that my friends are psychic.

When making this dessert, I was hesitant to use the provided yellow cake recipe and wanted to find a different recipe online and combine it with the pineapple topping suggested. I ultimately decided to just try the original recipe (from Betty Crocker) before making any changes. The end result was so delicious. I made almost no modifications, and I would recommend sticking to the step-by-step recipe. I made my cake in a bundt pan, because it had been a while since I had used my bundt pan, but any cake pan works.

Enjoy!!!

OLYMPUS DIGITAL CAMERAOLYMPUS DIGITAL CAMERA

OLYMPUS DIGITAL CAMERA

INGREDIANTS:

1/4 cup butter or margarine
2/3 cup packed brown sugar
9 slices canned pineapple (from 14-oz can), drained
9 maraschino cherries without stems
1 1/3 all-purpose flour
1 cup granulated sugar
1/3 cup shortening
1 1/2 teaspoons baking powder
1/2 teaspoon salt
3/4 cup milk
1 egg

DIRECTIONS:

  1. Heat oven to 350°F. In 9-inch square pan, melt butter in oven. Sprinkle brown sugar evenly over melted butter.
  2. Arrange pineapple slices over brown sugar. Place cherry in center of each pineapple slice and in any other holes in between pineapple pieces
  3. In medium bowl, beat remaining ingredients with electric mixer on low speed 30 seconds, scraping bowl constantly. Beat on high speed 3 minutes, scraping bowl occasionally.
  4. Pour batter over pineapple and cherries. Bake 40-50 minutes or until toothpick inserted in center comes out clean.
  5. Immediately place heatproof serving plate upside down over pan; turn plate and pan over. Leave pan over cake a few minutes so brown sugar mixture can drizzle over cake; remove pan. Serve warm or cover and refrigerate.

Love,

Ally